Date:
July 11, 21
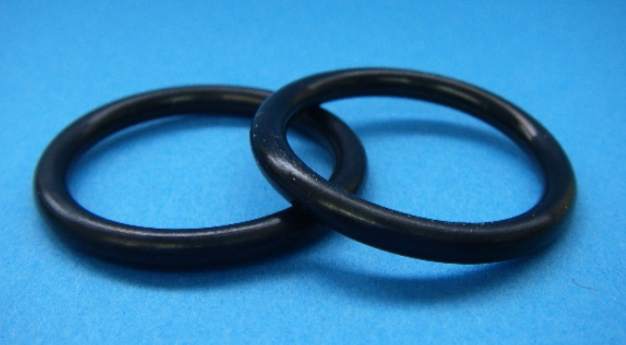
One of the sorting projects we are currently pursuing is the O-ring.
It is used in all industries such as automobiles, aviation, semiconductors, hydraulic and pneumatic equipment.

We are challenging 100% inspection at the request of Japanese company H,
Like an O-ring used to open and close car assist grips and dashboards
It is necessary to detect burrs and cracks (cracks / chips) that affect the sealing mechanism.
I am surprised that we are currently handling 3.2 million pieces a month both with our own sorter and visually.
.png)
If you can adjust it, the difficulty is not so high. However, the problem is the work size and rubber characteristics.
Company H's products have an outer diameter of 7 to 10 mm and a thickness of about 1 mm, and they are light enough to fly when blown, making it difficult to manage the number of people and handle them.
And unlike metal parts, rubber products are also sticky, so if the parts feeder and supply rail part are dirty
Brings extra foreign matter such as dust and dirt. Even if these small dust and dirt adhere
The ratio of NG judgments in image inspection will increase significantly.
The clean level of the automatic sorter also greatly affects the inspection efficiency, and it is a very light and delicate product.
It's a lot of learning for us, who usually deal with heavy and rough metal parts.
Work procedure manual for O-ring inspection, work supply speed, control of NG ratio, etc.
There are still issues to be solved, but for the time being, the image selection itself is only in sight, so we are planning to start mass production inspection from around August.
So, even if you don't have a track record at the time of consultation, starting from the customer's troubles,
We believe that it is our role to work together to find the best solution.
It is possible to judge outer diameter, inner diameter, roundness, cylindricity, burrs, cracks, etc. with a repetition accuracy of +/- 1 pixel.
It has a two-layer structure that can measure up to an outer diameter size of 35 mm, and the first layer is a belt type to judge whether the appearance is NG or different.
After that, the O-ring is inverted in the second layer and guided to the glass table, and the dimensions, burrs, and deformation are judged.
Cycle time is about 200-250pcs / min, if our company also expands O-ring selection
I want one.
This time, we introduced an image selection project for O-rings.
Regarding image selection requests for other rubber products, etc.
If you have any questions or concerns, please feel free to contact us.
Then, let's make this week a wonderful week ♪
Click here for back numbers [sorting service articles] ☆ 彡
For inquiries, please contact here ↓
*━*━*━*━*━*━*━*━*━*━*━*━*━*━*━*━*━*━*━*━*
Company name: Nano Seimitsu Co., Ltd
Address: 162 Moo 17 Bangplee Industrial Estate Sio3, Debaratana Rd.,
Bangsaothong, Samutprakarn 10570 Thailand
Yada Mobile: +66 (0) 61-572-1700 (Japanese direct)
Email: yada@fortune-cross.com
*━*━*━*━*━*━*━*━*━*━*━*━*━*━*━*━*━*━*━*━*
It is used in all industries such as automobiles, aviation, semiconductors, hydraulic and pneumatic equipment.

We are challenging 100% inspection at the request of Japanese company H,
Like an O-ring used to open and close car assist grips and dashboards
It is necessary to detect burrs and cracks (cracks / chips) that affect the sealing mechanism.
I am surprised that we are currently handling 3.2 million pieces a month both with our own sorter and visually.
.png)
The burr and crack judgment itself is even the setting of the camera (two upper cameras, one lower camera, one horizontal camera) and lighting.Judgment item itself is not difficult
If you can adjust it, the difficulty is not so high. However, the problem is the work size and rubber characteristics.
Company H's products have an outer diameter of 7 to 10 mm and a thickness of about 1 mm, and they are light enough to fly when blown, making it difficult to manage the number of people and handle them.
And unlike metal parts, rubber products are also sticky, so if the parts feeder and supply rail part are dirty
Brings extra foreign matter such as dust and dirt. Even if these small dust and dirt adhere
The ratio of NG judgments in image inspection will increase significantly.
The clean level of the automatic sorter also greatly affects the inspection efficiency, and it is a very light and delicate product.
It's a lot of learning for us, who usually deal with heavy and rough metal parts.
Work procedure manual for O-ring inspection, work supply speed, control of NG ratio, etc.
There are still issues to be solved, but for the time being, the image selection itself is only in sight, so we are planning to start mass production inspection from around August.
So, even if you don't have a track record at the time of consultation, starting from the customer's troubles,
We believe that it is our role to work together to find the best solution.
CCT, one of the long-established image inspection equipment in Taiwan, also has equipment dedicated to O-ring inspection.Inspection device for O-ring
It is possible to judge outer diameter, inner diameter, roundness, cylindricity, burrs, cracks, etc. with a repetition accuracy of +/- 1 pixel.
It has a two-layer structure that can measure up to an outer diameter size of 35 mm, and the first layer is a belt type to judge whether the appearance is NG or different.
After that, the O-ring is inverted in the second layer and guided to the glass table, and the dimensions, burrs, and deformation are judged.
Cycle time is about 200-250pcs / min, if our company also expands O-ring selection
I want one.
This time, we introduced an image selection project for O-rings.
Regarding image selection requests for other rubber products, etc.
If you have any questions or concerns, please feel free to contact us.
Then, let's make this week a wonderful week ♪
Click here for back numbers [sorting service articles] ☆ 彡
For inquiries, please contact here ↓
*━*━*━*━*━*━*━*━*━*━*━*━*━*━*━*━*━*━*━*━*
Company name: Nano Seimitsu Co., Ltd
Address: 162 Moo 17 Bangplee Industrial Estate Sio3, Debaratana Rd.,
Bangsaothong, Samutprakarn 10570 Thailand
Yada Mobile: +66 (0) 61-572-1700 (Japanese direct)
Email: yada@fortune-cross.com
*━*━*━*━*━*━*━*━*━*━*━*━*━*━*━*━*━*━*━*━*


