Date:
May 03, 21
There are various possibilities of defects at the manufacturing site.
Occasionally, you may encounter unexpected defects.
For example, if the material is different in a specific lot, heat treatment abnormality or process jump occurs, it will be a serious situation.
If there is a risk of serious quality failure, you must make sure to stop the NG outflow.
However, even if you look at the target work, measure the dimensions, or measure the weight, you cannot tell the difference.
It is impossible to measure the hardness of all the things that have been made and guarantee all of them, and it takes time and effort.
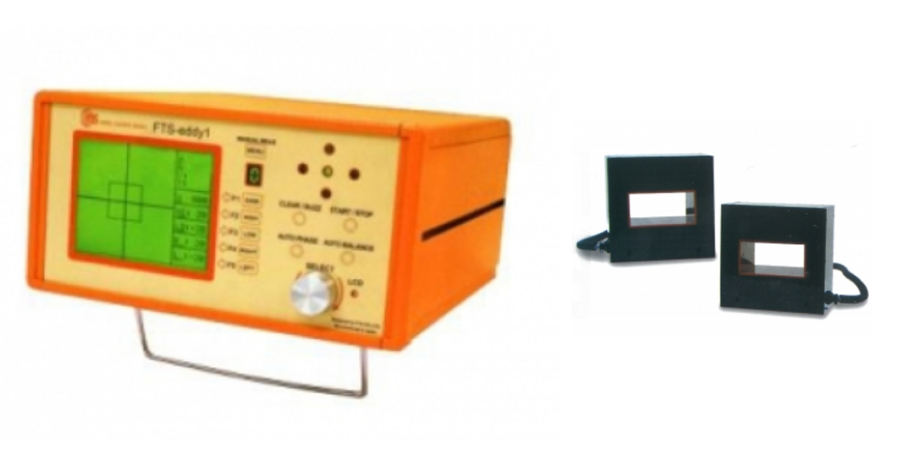
This eddy current flaw detection tester "FTS-eddy 1" is useful in such cases.

It can be used for inspection of various metal parts by a comparison method using a master coil and a test coil.
By passing the test piece through the coil through which the eddy current flows, it is possible to determine large scratches (defects), differences in shape / material, and hardness. Normally, hardness is measured by scratching with a hardness tester, so it can only be checked by sampling sampling, but this is an excellent non-destructive 100,000 piece that can be inspected for 100,000 pieces.
Set the EDDY probe (coil) and
It is possible to inspect EDDY at the same time as automatic sorting.
While inspecting dimensions, deformation, and MIX measures at a sorting speed of 150-300 pieces per minute
It should be a great merit to be able to judge heat treatment abnormalities and different materials.
From the standpoint of operating a mass production factory, there are no problems with hardness abnormalities or material differences.
It ’s definitely a big taboo problem,
If you should face such a situation, please remember this e-mail newsletter.
In addition, if you have any questions or inquiries regarding 100% inspection before shipping, please contact us.
Please feel free to contact us.
This is the introduction of the overflow flaw detection tester, the savior for determining abnormal hardness and different materials!
Then, let's make this week a wonderful week ♪
For inquiries, please contact here ↓
*━*━*━*━*━*━*━*━*━*━*━*━*━*━*━*━*━*━*━*━*
company name: Nano Seimitsu Co., Ltd
Street address:162 Moo 17 Bangplee Industrial Estate Sio3, Debaratana Rd.,
Bangsaothong, Samutprakarn 10570 Thailand
Yada mobile : +66 (0)61-572-1700(Japanese direct)
Email: yada@fortune-cross.com
*━*━*━*━*━*━*━*━*━*━*━*━*━*━*━*━*━*━*━*━*
Occasionally, you may encounter unexpected defects.
For example, if the material is different in a specific lot, heat treatment abnormality or process jump occurs, it will be a serious situation.
If there is a risk of serious quality failure, you must make sure to stop the NG outflow.
However, even if you look at the target work, measure the dimensions, or measure the weight, you cannot tell the difference.
It is impossible to measure the hardness of all the things that have been made and guarantee all of them, and it takes time and effort.
This eddy current flaw detection tester "FTS-eddy 1" is useful in such cases.

It can be used for inspection of various metal parts by a comparison method using a master coil and a test coil.
By passing the test piece through the coil through which the eddy current flows, it is possible to determine large scratches (defects), differences in shape / material, and hardness. Normally, hardness is measured by scratching with a hardness tester, so it can only be checked by sampling sampling, but this is an excellent non-destructive 100,000 piece that can be inspected for 100,000 pieces.
There is also an eddy current testing machine (EDDY) that can be mounted on an automatic sorting machine.Combination of automatic sorter and EDDY
Set the EDDY probe (coil) and
It is possible to inspect EDDY at the same time as automatic sorting.
While inspecting dimensions, deformation, and MIX measures at a sorting speed of 150-300 pieces per minute
It should be a great merit to be able to judge heat treatment abnormalities and different materials.
From the standpoint of operating a mass production factory, there are no problems with hardness abnormalities or material differences.
It ’s definitely a big taboo problem,
If you should face such a situation, please remember this e-mail newsletter.
In addition, if you have any questions or inquiries regarding 100% inspection before shipping, please contact us.
Please feel free to contact us.
This is the introduction of the overflow flaw detection tester, the savior for determining abnormal hardness and different materials!
Then, let's make this week a wonderful week ♪
For inquiries, please contact here ↓
*━*━*━*━*━*━*━*━*━*━*━*━*━*━*━*━*━*━*━*━*
company name: Nano Seimitsu Co., Ltd
Street address:162 Moo 17 Bangplee Industrial Estate Sio3, Debaratana Rd.,
Bangsaothong, Samutprakarn 10570 Thailand
Yada mobile : +66 (0)61-572-1700(Japanese direct)
Email: yada@fortune-cross.com
*━*━*━*━*━*━*━*━*━*━*━*━*━*━*━*━*━*━*━*━*


